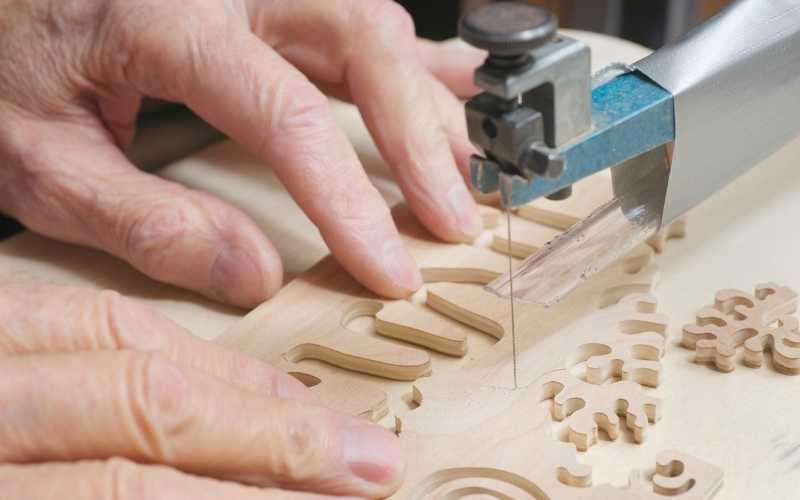
A scroll saw shadowbox can be used to display artwork or photos. A small shadowbox can add an element of wonder to your display. You can make a simple scene with seven layers of 1/4 inch Baltic Birch plywood. It measures approximately four inches square by 1.75 inches thick. The finished piece is enhanced by small details that add beauty and interest. A shadow box that is larger would require more detail, and it would be more complicated. This is the scene from the inside of the shadow box.
Fox Classic fence
The type of fence that you choose to use when building a scroll saw shadowbox is an important consideration. There are many options. Shop Fox Classic fences come with a quick-release blade guard and riving knife system. They are prewired for normal 120V 20A circuits.
Shop-Fox Classic fence is an option for your next project. This fence will last many years. The pattern options include the Five Layer Circle Art Scroll Saw Pattern (with a Duck Family Tray Scroll Saw Pattern), the Hanging OrganizerBox and the Four-Layer Jesus Cross. You can also view the video tutorial for each pattern to help you follow along.
Fox Aluma - Classic fence

Shop Fox Aluma Classic fence is a T shape accessory fence that can be used with any shop-made scrollsaw. The fence is very easy to set up, so you can easily cut even the largest panels. The fence is prewired to operate on an ordinary 120V 20A circuit and is equipped with a 10-inch, 40T carbide-tipped blade.
Fox Original Fence
The Shop Fox Original fence for scroll saws is an accessory that comes with a T-shape, prewired blade guard and riving knife system. It includes a riving knives system and a 10-inch x 40T carbide tip blade. It's a good idea to start small projects, such as a shadowbox, if your first time scroll sawing.
FAQ
How much does a hobbyist need to invest in getting started?
If you're looking to start your own woodworking business, you'll probably need some capital to buy the necessary tools and supplies. A good place to start would be by buying a small table saw, drill press, circular saw, jigsaw, and sanding machine. These items are affordable so you won’t break the bank.
How can I learn basic woodworking skills
It is an excellent way to learn how to build furniture. You can make a simple bench yourself. This project can easily be done using whatever wood you have at your house. If you aren't sure what type of wood to use, you can buy cheap pine boards from Lowes or Home Depot. After you've constructed your bench you'll want sand all the rough edges off and varnish it.
What type of wood should I choose?
The most commonly used woods for woodworking are oak, maple, cherry. Each wood variety has distinct characteristics that influence the final product's look and feel. Oak tends to be harder and darker than other woods. Birch is lightweight and soft while mahogany is heavier and denser. You can also pick between veneers and solid wood. Veneers consist of thin sheets made from wood and glued together to form a single layer.
How often should new supplies be purchased?
You may have to replace certain tools. Sharpening hand tools is a must. Power tools will require replacement parts every so often. Try spreading your purchases over a few months so you don't buy too many at once.
Where do I start with woodworking?
The best way to learn how to build furniture is by building furniture. You'll need tools, and you'll have to make mistakes along the way, but if you keep at it, you'll eventually figure out what you're doing.
First, choose a project you would like to complete. It can be as simple as a small box, or as complex as a complete entertainment center. Once you've settled on a project find a local skilled woodworker. Ask the local woodworker for help in deciding what tools and where to get them. Perhaps you could ask if there is someone else who does this type of work.
Statistics
- Most woodworkers agree that lumber moisture needs to be under 10% for building furniture. (woodandshop.com)
- Overall employment of woodworkers is projected to grow 8 percent from 2020 to 2030, about as fast as the average for all occupations. (bls.gov)
- Average lumber prices rose about 600 percent between April 2020 and May 2021. (familyhandyman.com)
- In 2014, there were just over 237,000 jobs for all woodworkers, with other wood product manufacturing employing 23 percent; wood kitchen cabinets and countertop manufacturing employing 21 percent. (theartcareerproject.com)
External Links
How To
How to stain wood
Staining wood is the process of applying chemicals to the wood's exterior, which alters its color. This chemical reaction causes wood to turn from whiteish to brownish. Oak is the most commonly used wood for staining, but other woods can also be stained.
There are many options for applying stains to wood surfaces. Mixing the stain in a solvent such as turpentine and spraying it onto the wood is one method. Others use a solution made up of water and dye, which is then applied directly onto the wood. It is possible to mix stain into varnishes and paints, making it part of the finishing coat.
Preparing the surface is the most important step in staining wooden surfaces. Clean the wood to get rid of any grease, dirt or other substances that might be detrimental to the stain's application. Sanding can smoothen out scratches and uneven spots. The next step is to determine the type of stain you would like to use. Penetrating stains are different from non-penetrating. Penetrating stains penetrate deeper than non-penetrating stains, which makes them great for dark colors like mahogany. The best non-penetrating colors are those that work with light colors like maple.
You will need to decide on the type of stain you want to use, and then prepare your tools. A paintbrush works well for applying stains because it allows you to spread the liquid evenly across the surface. It is a good idea to have rags on hand in case you need them to clean up any stains that may remain after you have finished painting. If you intend to mix the stain yourself you will need enough containers to hold all the components.
Once you have prepared all your materials, it is time to clean the areas where you will stain the wood. Use warm water and soap to clean away dirt and dust. Wipe down all furniture pieces with a dampened cloth and clean water. You should remove any debris, especially if your plan is to stain darker wood.
Apply the stain next. The stain can be applied by spraying or brushing the stain onto one end of the furniture. Move slowly and carefully along the grain of your wood until you reach its opposite end. Be careful not to let the stain drip off the wood's edge. Before proceeding to the next step, let the stain dry thoroughly.
Apply a clear polyurethane sealant to protect the painted surface. Apply three coats polyurethane sealer. Allow the third coat to dry overnight before sanding the final coat.