Before beginning to tackle more complex wood turning projects, there are a few essential skills that beginners need to master. A simple project for beginners is to turn a handle for a hand hammer. Beginners can also do a variety of smaller projects to get the hang of the craft. However, the more experienced woodworker can progress to more complex projects once they have learned the basics. Below are the basics of woodturning.
Spindle turning
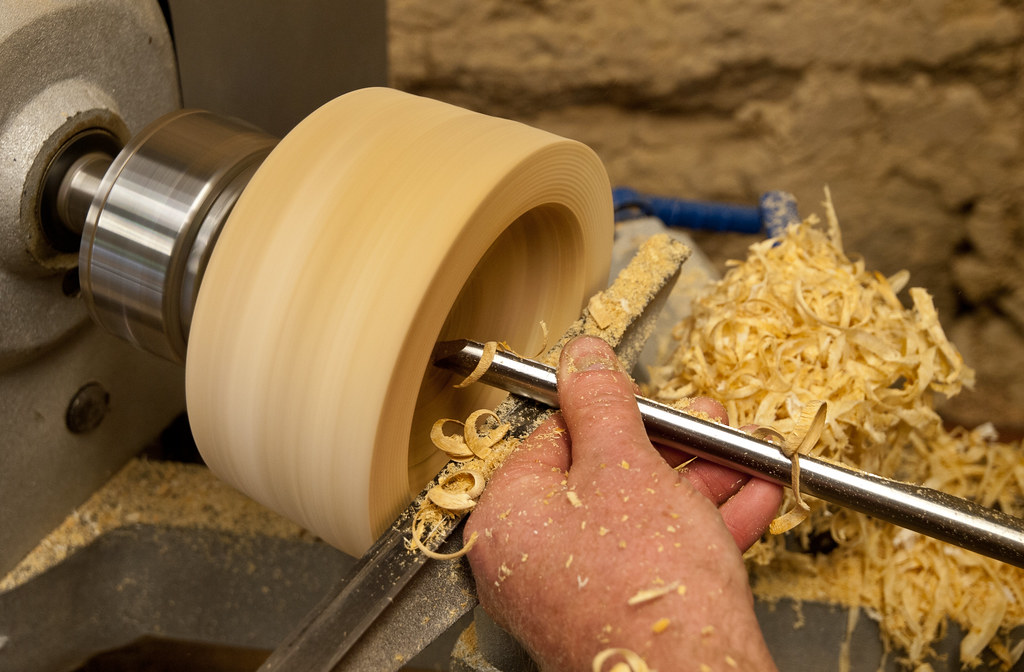
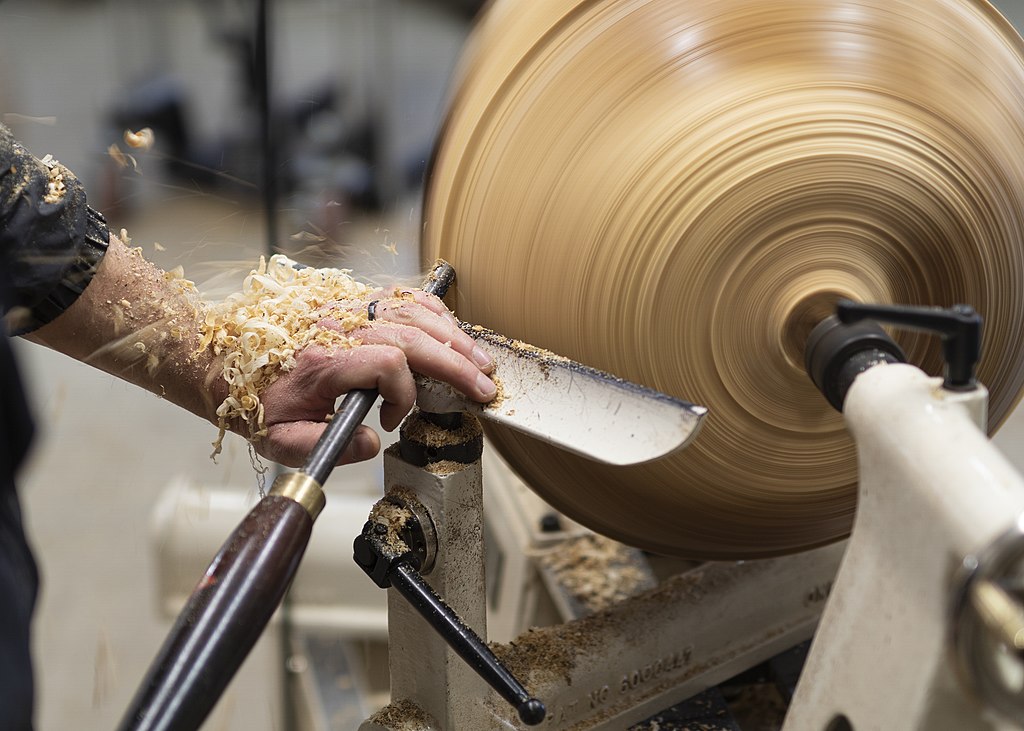
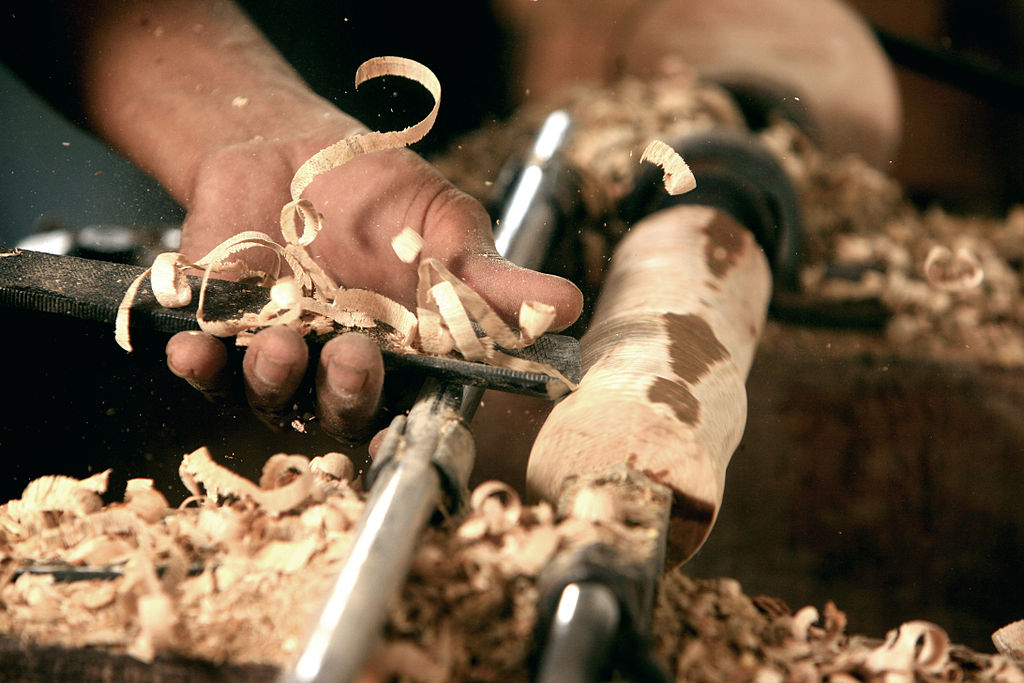
To create a spinning device, you need a square blank. You can mount the blank between your tailstock and the headstock by using a roughing saw. When the blank has the desired diameter, use a caliper to measure it. Next, using a parting knife, turn the spindle so that it has the desired diameter. Measure the diameter of each section using a caliper. Next, place the tool rest between each groove until you reach the desired diameter.
Woodturning is an enjoyable hobby. It is also rewarding. Many techniques are useful for safe turning and spindle production. You can use the knowledge that you have gained to make a variety of projects. Although this article doesn't address every aspect of woodturning safety it can be used as a starting point. You should always consult a professional for more information regarding safety.
Softwoods are great for work
Hardwood and softwood are the two main types of wood. Hardwoods, such as maple, oak and hickory, are great for turning. Softwoods are better for carving. European yew makes excellent bows and instruments. Softwood is better for making furniture. Engineered woods like yellow pine are not suitable for turning.
The problem with softwoods is their tendency to retain pitch pockets. This can cause problems for your finished work. Even after drying, the wood can still leak pitch. You should protect clothing and other surfaces that may be exposed to this pitch. Pre-stain conditioner can be applied to softwood before any stain can be applied. Pre-stain conditioner is a thick coat that soaks into the wood's fibers. It acts as a barrier between the wood's porous regions and the wood itself.
Limit speed at the lathe
Most wood turners agree that the maximum lathe speed for a given diameter should be between 6,000 and 9,000 rpm. But there are several factors to consider, including the work piece's characteristics. A piece measuring three inches in diameter should run at 2,000 rpm. A piece measuring ten inches should run closer to 600 RPM. A limiter to lathe speed is how much vibration the work piece can withstand. So, a lower RPM works best.
The speed of your lathe should be set to allow you turn blanks without vibration. If the workpiece is small or requires careful shaping, a lower speed setting might be better. You will get smoother work with higher speed settings, and vice-versa. Experiment with various speeds to find the best speed for your woodturning job. A smoother result will be obtained if you turn at higher speeds.
Useful tools
The following list includes some of the tools you will need for your woodturning projects. A skew is a tool with a beveled cutting edge that is used for shaping wood. This tool is able to cut long ribbons of wood out of a piece and is more efficient than other lathe tools for cutting end grain woods. The skew-chisel is also better at creating smooth, flat surfaces for turning bowls or spindles.
It is important to invest in quality tools for woodturning projects. Cheap tools are not recommended as they won't hold an edge well. A sharpening system is essential for high-speed steel. For a more efficient job, you'll need a grinder that has a good 8" diameter.
FAQ
How can my shop be organized?
Setting aside an area to store tools is the first step in keeping your workshop organized. Make sure your tools are clean and free of debris and dust so they can be used properly. To hang accessories and tools, use pegboard hooks.
How long does it usually take to complete a piece furniture?
It depends on which wood you choose, how complicated your design is and what amount of finishing you apply. Hardwoods, on the other hand, are more durable than softwoods. Hardwoods can also be more costly than softwoods. They last longer and are more resistant to moisture. The process of finishing a piece of furniture typically takes anywhere from one week to three months.
Can I refinish furniture that I make?
Yes! There are plenty of ways to refinish old pieces of furniture without having to pay a pro. Here are some examples:
Use sandpaper to remove scratches and stains. Then wipe down the surface with a clean cloth.
Apply clear polyurethane varnish. Let dry completely before moving furniture around.
Paint furniture with acrylic paint.
Stain can be used instead of paint. You can give your furniture a rich appearance with stain.
Shellac wax is applied. Applying wax will give the wood shine and protection.
What tools should you start with to become a woodworker
Woodworking is an art that takes patience and practice. It takes time to learn how to use all the different tools and techniques required for woodworking.
There are many kinds of woodworking equipment currently on the marketplace. Some people prefer to use power tools while others prefer manual tools.
It's your choice. But you should ensure that you pick the right tool. Start with a basic set if you don’t have any previous experience.
You could also try learning how to use a router which is used to cut intricate shapes into wood. These routers can be purchased at most hardware and home improvement stores.
Where can I find free woodworking plans?
Woodworking plans can be found online without the need to purchase books or magazines. You just need to search Google. Enter "free woodworking", and you will see hundreds upon hundreds of websites offering free plans.
Statistics
- The best-paid 10 percent make $76,000, while the lowest-paid 10 percent make $34,000. (zippia.com)
- Average lumber prices rose about 600 percent between April 2020 and May 2021. (familyhandyman.com)
- The U.S. Bureau of Labor Statistics (BLS) estimates that the number of jobs for woodworkers will decline by 4% between 2019 and 2029. (indeed.com)
- Overall employment of woodworkers is projected to grow 8 percent from 2020 to 2030, about as fast as the average for all occupations. (bls.gov)
External Links
How To
How to stain wood
The process of staining wood involves the application of chemicals to the wood's surface, which causes it to change its color. This chemical reaction causes wood to turn from whiteish to brownish. Although oak is the most popular type of wood to stain, there are many other types that can be used.
There are many options for applying stains to wood surfaces. Some methods involve mixing the stain with a solvent (such as turpentine) and then brushing or spraying the mixture onto the wood. Other methods use a solution of water and dye applied directly to the wood. You can also mix stains with varnishes or paints so that they become part the finish coating.
Preparing your wood for staining is the first thing to do. To apply the stain, clean the wood completely. Sanding the wood smooths out rough spots and scratches. Next, you need to decide which stain you want. There are two types of stains that can be used: penetrating and non-penetrating. Penetrating stains penetrate deeper into the wood than non-penetrating ones, making them ideal for dark colors such as mahogany. Non-penetrating stains work best with light colors like maple.
After choosing the type and application method you prefer, gather your tools. The best tool for applying stains is a paintbrush. It allows you to evenly distribute the liquid over the surface. To remove any stains left behind after painting, you will need some rags. If you are planning to mix your stain, ensure you have enough containers for each component.
After you have prepared your materials for staining, clean the area. Use soap and warm water to remove dust and grime. You can wipe down the entire furniture using a damp rag with clean water. Take care to remove all debris and dirt, especially if you are planning on staining darker wood.
Next, apply the stain. Start at one end of the piece of furniture and brush or spray the stain onto the wood. Work slowly and carefully, moving back and forth along the grain of the wood until you reach the opposite end. Make sure that the stain does not drip off the edge of the wood. Before moving on to the next steps, allow the stain drying completely.
Protect the painted surface with a coat polyurethane paint sealant. Apply three coats of polyurethane sealer. Let the third coat dry overnight before you sand the final coat.