A lidded package is a faceplate project. It requires that you square both the box's perimeter and sides. The lid and box are typically cut from the same 2-in thick block of seasoned wood. To square the base, start by cutting a foot on one side of the wood. To ensure that the final box is able to sit on it, you need to make sure the base's center is slightly recessed. Cut the recess with a small scraper.
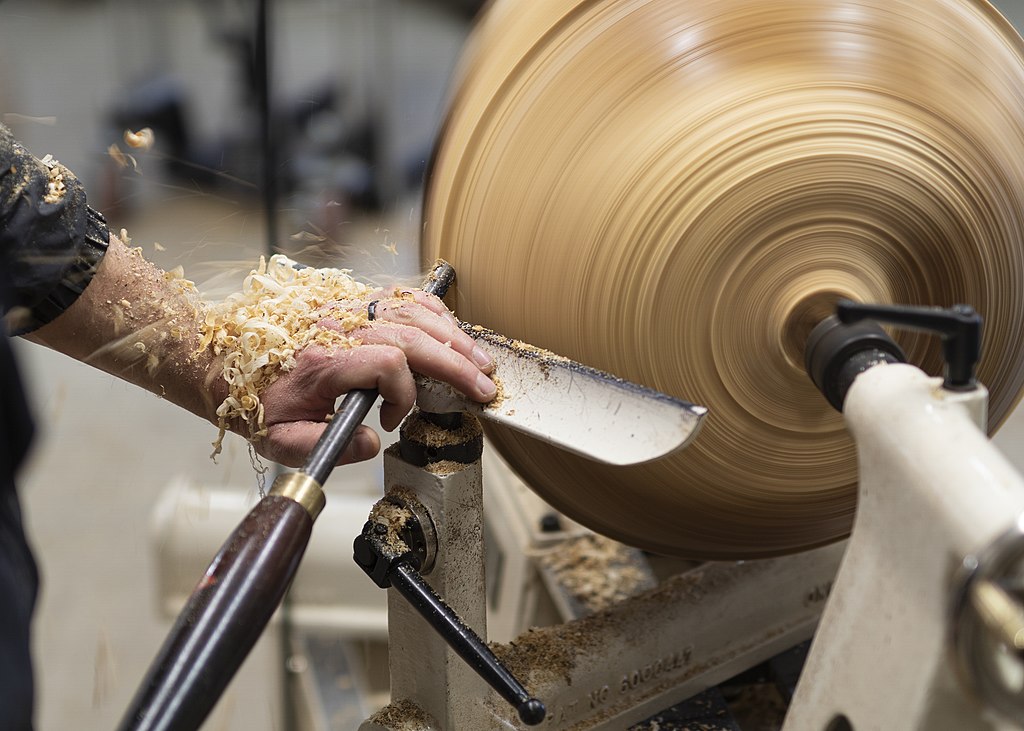
The challenges of hollowing end grains in lidded box
The hollowing of end grain is a common challenge when box-making. This process is complicated and requires specialist tools. An old screwdriver can be used to create a basic hollowing tool that costs $30. Alternativly, you could buy a gouge that can be used for this purpose. The key to hollowing end grain is to avoid using sharp edges. A gouge should be a long, flat bevel with a round fingernail.
It is five times harder to hollow end grain than side grain. This is one of the greatest challenges in hollowing end grain. It is also susceptible to tearing out. This is one of the reasons why experienced bowl turners often experience problems when hollowing end grain. This can be solved by changing from a gouge into a scraper, but it's worth noting that lidded containers often require special tools for hollowing end grain.
Techniques for making a snap-fit lidded box
A snap-fit lidded container is a container that has a sliding closure. These boxes often contain liquid or other liquid-filled containers. They are easy-to-assemble and disassemble. There are many snap-fits, so engineers need to choose the most cost-effective, strong, and reliable. The following article provides an overview of the various types of snap-fits.
When using a 3-D printer to create a snap-fit lidded box, it is important to design the upper half with the correct measurements. The upper section should fit snugly with the base. The lid must not move while seated. In order to ensure a proper fit, the lid must be tightened. To achieve this, wood removal should be done in small increments. Although this may seem difficult, it is well worth the effort.
Wooden used to make lidded boxes
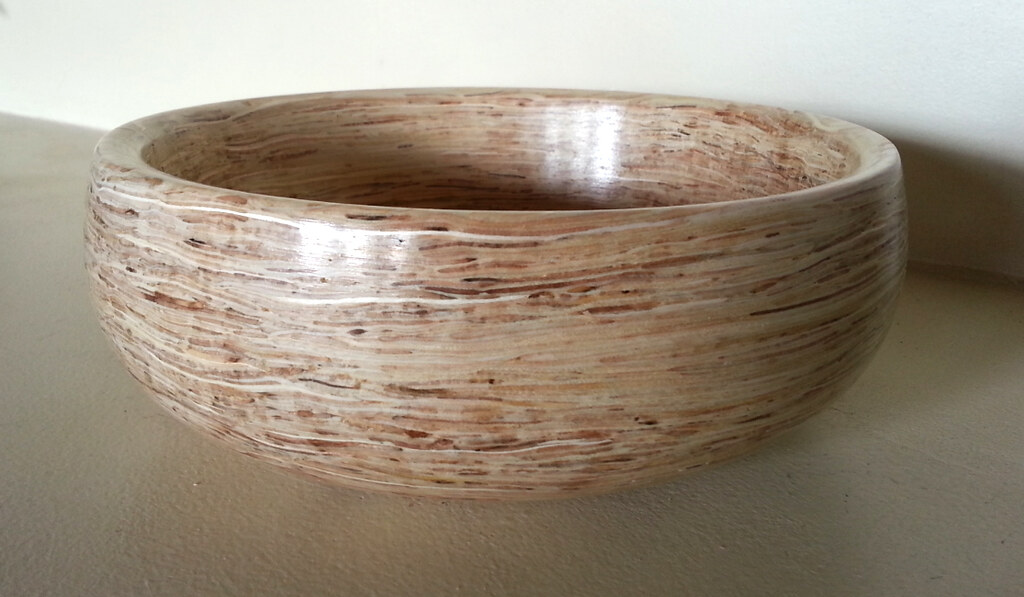
The various types of woods used to make lidded boxes are salvaged from trees. Once the wood has been removed from a tree, it is dried to prevent cracks. A second drying process results in wood shrinkage. The lidded box can be made of various types of wood, depending on the style. A lid is typically made of two pieces. One piece is smaller than the others.
The lathe turned small circular containers into lids. Boxwood, a slow growing tree with a fine grain and thin sections, is the most common wood used by a turner. Because the grain was very close together, this wood was great for making fine details. This wood was often used to make double-sided, combs. The boxwood used in the making of lid boxes was also known by the name pyxides.
Size of lidded box
The type of wood that you use determines the size of the lidded container. Most commonly, maple and cherry are used. These two types are great for making boxes. They have different shrinkage rates. A quality box should have a minimum of three inches square and a maximum length of five to six feet. When choosing the wood for your box, make sure it is dry throughout. Exotic woods can be used to make a beautiful lid. However, it is important that you are familiar with the process.

Preparing the wood is an important step. To smoothen and round the bottom of the box, a thin chamfer will be needed. After that, cut a V-shaped cut at the joint. Once you're satisfied with the design, you can use the spindle-roughing touge to finish shaping and finishing the rest. Use a parting tool before you begin carving the lid. Then, you can use a skew-chisel or a pencil to create a small chamfer at the base of your lid. This will soften the corner and conceal a slight circularity at the base/lid joint.
FAQ
What wood items do well?
The most successful wooden items are made from sustainable wood.
The most used wood types for furniture are oak, maple and walnut.
These woods are very strong, but they also have beautiful grain patterns and colors. They are also very durable if properly maintained.
To prevent moisture damage to wood furniture, it is important that it be painted before any other surfaces. This applies to all surfaces including drawers, doors, handles, and handles.
If you want to make sure that your furniture lasts as long as possible, then you should choose a paint that is resistant to water.
A high-quality oil-based primer should be used, followed by two coats with top coat. It is possible to apply multiple coats depending on how heavy the wear.
You should avoid using aerosol paints or spray cans. These products contain solvents which evaporate quickly and leave behind harmful fumes.
How do I organize my shop?
The first step toward keeping your workshop clean and organized is to set aside a designated area for storing tools. To keep your tools sharp and ready for work, keep them clean of dust and debris. You can hang tools and accessories with pegboard hooks.
Where can I locate free woodworking plans
You don't need to purchase any books or magazines to find free woodworking plans. Search Google for free woodworking plans. You can search Google for "free woodworking" and hundreds of websites will appear allowing you to download plans.
What's the difference between plywood vs particle board?
Plywood can be described as a mixture of layers and wood that have been pressed together with pressure. Plywood comes in several thicknesses and is commonly used for cabinets and flooring. Particle board is made up of sawdust mixed in resin, then compressed into large pieces. It's used for home improvement projects. Both types of boards can be easily cut and are durable.
Statistics
- In 2014, there were just over 237,000 jobs for all woodworkers, with other wood product manufacturing employing 23 percent; wood kitchen cabinets and countertop manufacturing employing 21 percent. (theartcareerproject.com)
- Woodworkers on the lower end of that spectrum, the bottom 10% to be exact, make roughly $24,000 a year, while the top 10% makes $108,000. (zippia.com)
- The best-paid 10 percent make $76,000, while the lowest-paid 10 percent make $34,000. (zippia.com)
- Average lumber prices rose about 600 percent between April 2020 and May 2021. (familyhandyman.com)
External Links
How To
How to make wood joint
This tutorial will show you how to join two pieces of wood together. We will use the "pockethole joint," which means that we drill holes in the wooden pieces and then glue them together. This method is great if your wood's straight and smooth. If your wood isn't straight or flat, you might want to try another method, such as dowel joinery. Here are the steps
-
Drill Pocket Hole Joints. To start, measure and mark where you want to put the pocket hole joint. Next, drill 3/4 inch holes in each end of each piece using a handheld drilling machine or jigsaw.
-
Sand Smooth. You can sand the edges of the wood to ensure that it doesn't split.
-
Glue Together Apply glue to both ends of the wood. Let it sit for about 5 minutes before clamping the pieces together.
-
Connect the pieces. After the glue has dried completely, you can clamp the pieces together until they are flush.
-
Trim Joinery. Trimming the joinery after glue has completely dried.
Allow enough space between pieces so you can turn them inside out.