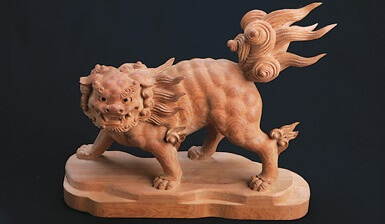
You will need to select a piece or wood for the first step. Next, make the cuts. Follow along with the expert as he guides you through the steps. The progressing cut will make carving the face much more realistic. It is important to create a lifelike facial expression by adjusting the position of the noses in the wood. In addition to the face outline, you may also choose colored dyes and shellac to add a realistic finish.
Hardwoods
The type of wood used to carve a face in wood must be considered before you begin carving. Hardwoods are broad-leaved trees that can grow in all climates. Because of their wide range of density, strength, and appearance, hardwoods are suited for various purposes, including building and furniture. Hardwoods can be more expensive, but they are also more durable and resistant to fire.
If you are new to wood carving you might consider softwood such as butternut and basswood. These woods can be easier to work in and are a great choice for beginners. However, you should remember that softer woods cannot hold the same quality and finish as hardwoods. Try different types of wood before you settle for one.
Softwoods
The first step in carving a wooden face is selecting the softwood to use. Softwoods are harder to carve and can often be knotted. You can also break them more easily if you use large strokes. Beginners will often cut small pieces of wood to reduce detail. Although this is not a serious problem, it is important to be aware.
Some hardwoods can be more difficult than others. Aspen, butternut and basswood are some of the most easy to work with. Use knives with a sharper bevel to achieve this. Softwoods can be worked with more easily than hardwoods. They can be cut along or across their grain. The quality of the finished product will depend upon the wood you use to carve it.
Colored Dyes
For wood carvings that are vibrant and detailed, you can use colored dyes. You can find these in a wide variety of colors and mix them with water or alcohol to create a unique colour. For lighter woods, you can use colored dyes mixed with shellac. Use denatured alcohol to clean your brushes after you have applied the dyes. You can also use paste wax. Excessive glossiness can distract you from your work. Use 0000 steel wool to remove excess glossiness.
There are many wood dyes available and they can be applied easily. Wood dyes can be used with any topcoat and are very easy to apply. These dyes also solve common finishing problems. Because they come in a wide array of primary colors, they're easy to mix and apply. They can also be purchased in different shades so that you can create your own unique colors. You can mix them to make unique colors.
Shellac
Shellac is a product that can be applied to wood carvings. Make sure you have it handy. You can purchase a jar of shellac, but the easiest way to apply it is to use a brush. A two-pound cut is sufficient. This is because the shellac will gradually build up and will reduce brush marks. Because shellac is very thin, it is best to purchase a thicker than a thinner cut. Make your own pad out of small pieces of cotton and lintfree cloth. This will ensure you get the right amount. Next, dip your tip into the shellac. Let the excess water flow back into the bottle.
Use shellac to add color and highlight grain. Shellac can be mixed with different colors to create custom blends. You can darken the shade with extra coats of lac. Shellac doesn't get cloudy or yellow like other wood finishes. You can also make more faces with it because it lasts longer. You can also do this with any wood carving project.
Gouges
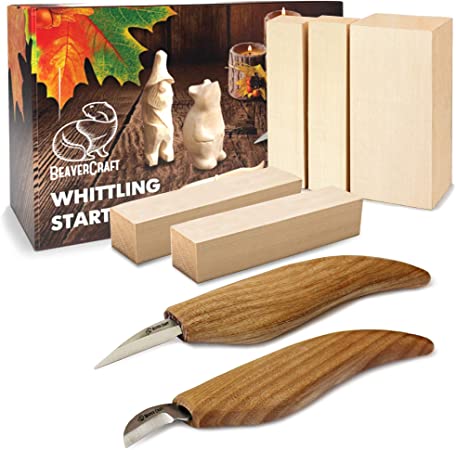
There are many types of gouges. Straight and palm gouges are two of the most popular types. Straight gouges should be held by hand. While palm gouges have shorter shafts or handles, they can be used with your hands. Hand held carving is easier with the shorter handles. Palm gouges are also called veiners and are ideal for carving faces in wood. These are some important things to remember before you begin carving.
You must first know how to select the right gouge. The gouge you choose should be able to carve a shallow v-shaped groove. Make sure you buy a tool with a sharp edge and a small sweep. The most common way to classify gouges is by their size. A 3/10 gouge will create the same-sized cut as an 5/10 gouge. As the number increases, the scoop between each edge becomes deeper and the sweep becomes more curved. A small-sized gouge will be capable of carving a shallow profile.
FAQ
How can a novice woodworker make it big?
Many people are starting to learn how to build furniture because they want to start an online business. If you are just starting to build furniture, there are many other ways to make money than selling on Etsy. Sell at craft fairs or other local events. Or you could offer workshops for others who want to learn how to build their own furniture. If you have the experience to be a carpenter, builder, or a designer, you may consider offering your services in remodeling homes or creating custom pieces.
Where to Buy Hardwood Lumber?
Home Depot has hardwood lumber for sale. They carry a variety of wood products such as flooring, cabinets, and furniture.
A large variety of engineered hardwoods is available to them, including Ipe (Araucaria Angustifolia), Brazilian Cherry and Peau d'Arco.
These woods can be found online by searching for "hardwood lumber" in Google.
Where can you buy your woodworking materials?
There are many places you can get everything you need, and you don't have to go far. For example, you could visit local hardware stores or look online at websites like Amazon.com.
You can also search flea and garage sales for furniture and other materials that can be reused.
What is the minimum investment a hobbyist needs to make in order to get started?
To start your own woodworking company, you will likely need capital to purchase the necessary tools and other supplies. A good place to start would be by buying a small table saw, drill press, circular saw, jigsaw, and sanding machine. These items aren’t too expensive so you won’t have to break the bank.
How do I get started with woodworking?
The best way to learn how to build furniture is by building furniture. While you will need tools and make mistakes, you will eventually master the art of building furniture.
Start by choosing a project you'd like to complete. You can make a simple box or a large entertainment center. Once you have settled on a specific project, it is time to find a woodworker in your area who is experienced in such work. Ask them for suggestions on the tools you will need and where to buy them. You might even ask whether there's someone else you can talk to who does this kind of work.
What tools are best to begin with when I become a woodworker
Woodworking is an art. It requires patience. It takes time for you to master the different techniques and tools that are required to woodwork.
There are many types of woodworking equipment on the market today. Some prefer to use power tools, while others prefer to use hand tools.
The choice is yours, but you must ensure you choose the right tool for the job. Start with a basic set if you don’t have any previous experience.
You could also try learning how to use a router which is used to cut intricate shapes into wood. These tools can be purchased at most hardware stores.
Statistics
- The U.S. Bureau of Labor Statistics (BLS) estimates that the number of jobs for woodworkers will decline by 4% between 2019 and 2029. (indeed.com)
- The best-paid 10 percent make $76,000, while the lowest-paid 10 percent make $34,000. (zippia.com)
- In 2014, there were just over 237,000 jobs for all woodworkers, with other wood product manufacturing employing 23 percent; wood kitchen cabinets and countertop manufacturing employing 21 percent. (theartcareerproject.com)
- Overall employment of woodworkers is projected to grow 8 percent from 2020 to 2030, about as fast as the average for all occupations. (bls.gov)
External Links
How To
How to stain wood
The process of staining wood involves the application of chemicals to the wood's surface, which causes it to change its color. This chemical reaction changes the wood's color from white to brownish. Oak is the most common wood type for staining. However, you can also use other wood types.
There are many options for applying stains to wood surfaces. Mixing the stain in a solvent such as turpentine and spraying it onto the wood is one method. Another method involves applying a solution of water to the wood. Stains can also be mixed into paints and varnishes, becoming part of the finish coating.
Preparing the surface is the most important step in staining wooden surfaces. The wood must be thoroughly cleaned to remove all grease and dirt. Sanding smoothens any scratches or rough spots. The next step is to determine the type of stain you would like to use. Penetrating stains are different from non-penetrating. Penetrating stains penetrate deeper into the wood than non-penetrating ones, making them ideal for dark colors such as mahogany. Light colors such as maple work well with non-penetrating stain.
After you've decided what type of stain to apply, get ready for your tools. A paintbrush works well for applying stains because it allows you to spread the liquid evenly across the surface. It is a good idea to have rags on hand in case you need them to clean up any stains that may remain after you have finished painting. If you are planning to mix your stain, ensure you have enough containers for each component.
After you have prepared your materials for staining, clean the area. Use warm water and soap to clean away dirt and dust. You can wipe down the entire furniture using a damp rag with clean water. Take care to remove all debris and dirt, especially if you are planning on staining darker wood.
Next, apply the stain. Start at one end of the piece of furniture and brush or spray the stain onto the wood. Move slowly and carefully along the grain of your wood until you reach its opposite end. Make sure that the stain does not drip off the edge of the wood. Before proceeding to the next step, let the stain dry thoroughly.
A coat of clear polyurethane sealing agent is applied to protect the paint. Apply three coats of polyurethane sealer. Let the third coat dry overnight before you sand the final coat.