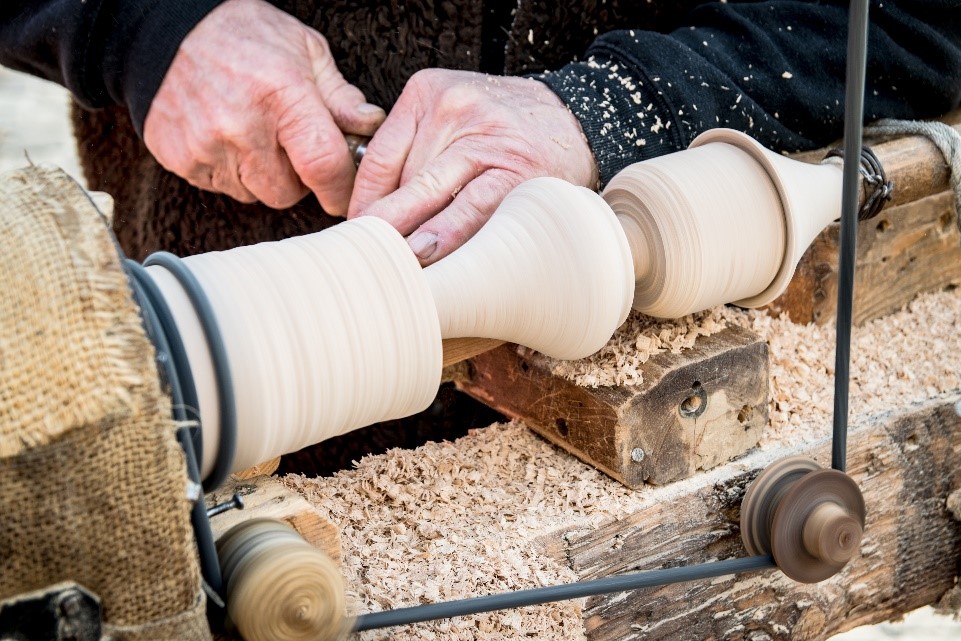
Woodturning is an exciting hobby that requires an accurate lathe. You will need to have different skills in order to accomplish this type work. While some tools are more suitable for this task, others require additional skills to be used effectively. Understanding the process is important before you begin. We will be discussing the various techniques and tools that are available. You'll also learn about the costs of these tools. You can start turning in no time by choosing the right lathe.
Lathe
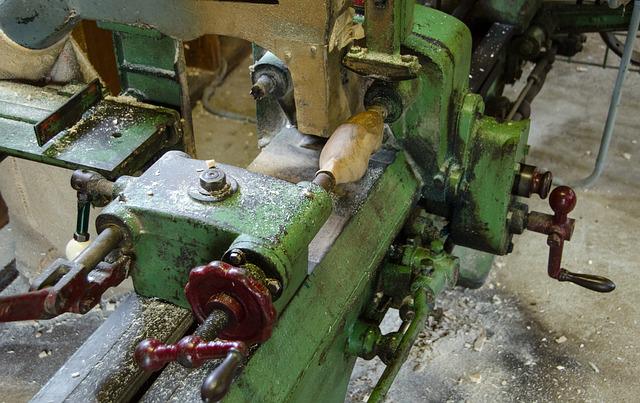
If you are looking to purchase a woodturning tool lathe, it is essential to do your research. There are several types available on the market, and you must be able to discern the quality of each before making your final purchase. These are some tips to help choose the right lathe for you.
Before you start your project, first dry the wood. Wood turns into a stable structure after several months. However, it will begin to warp as it loses water. Woodturners don’t like long boards. Instead, they prefer to score pieces. Woodturners usually target the figured areas of the tree. But if your goal is to make a really great woodturning item, you need to dry your wood to the right degree.
Tools
For woodturning, you will need: A pair of leather steel-toe boots, work benches, and a collection of saw blades. Safety glasses must be worn by woodturners. Some tools work better for smaller items while others are too big for larger pieces. Others will require you to learn more advanced skills. For large items, some woodturning instruments are not recommended as they can cause injury.

For beginners it is better to purchase individual tools than to buy several. It is important to buy high-quality tools that last a long period of time. In the beginning, you will need a roughing saw, diamond paring tool, skew, as well as a variety of sizes. For larger jobs, you should invest in quality steel tools. You can add to your toolbox with several gouges.
Techniques
The book A Lesson Plan For Beginners teaches you the basics of woodturning. The book provides step-by-step instructions and has photos and illustrations that show each technique. The book's structure is based on classroom experience. The book's structure is based on classroom experience. It covers everything from choosing timber to setting up the project, as well as the sanding procedure. A variety of projects are included in the book to help develop different skills.
Rough turning is an inexact science and results in unevenly turned pieces. To avoid splitting or bending the wood, you must work with its grain. You can't undo mistakes made while working with wood. Ultimately, you'll have to mount the piece on the lathe a second time and finish it. This technique is best for functional work. However, some artists also use rough turning to finish some pieces.
Cost
Woodturning is an enjoyable hobby. However, materials can also be a major part of the final cost. Wood bowls that cost $20 are only about four to five dollars an hour to turn, but they're not cheap. Wood bowl turners don't always value their work, and it's not uncommon for these craftspeople to cut corners on materials or to make cheap pieces that do more harm than good. Wood bowls that cost $20 can be given away to friends and family or donated to a nonprofit organization, so you should be aware of the costs involved.
A lathe is a crucial tool in the process. While the lathe can be purchased for a relatively low price, other tools and sharpening devices will be required to ensure you get the best results. You'll also need rests and centers to turn your wood. These items can add up to a few thousand dollars, so it's important to budget accordingly. Woodturning supplies offer a wonderful hobby and make any project much more enjoyable.
Getting started
There are some essential items you need to have in order to start woodturning. To ensure consistent sharpening, a lathe is an essential tool. But before you can get started, you need to learn a little bit about sharpening. These tips will help you begin your woodturning journey.
Begin by working with the grain. This is known as cutting downhill by many woodturners. For example, when hollowing out a cove you should work from the outside edges towards the center. If you cut uphill, it is harder to control the wood and your tool may catch. Be sure to carefully read the instructions. Woodturning can be made easier by paying attention to your work and being patient.
FAQ
Do I have to refinish my furniture?
Yes! There are many options for refinishing furniture that you don't need to hire a professional. Here are some examples:
To remove stains and scratches, use sandpaper. Next, wipe the surface clean with a damp cloth.
Clear polyurethane varnish should be applied. Before moving furniture, let dry completely.
Paint furniture with acrylic paint.
Instead of painting, use stain. The stain will give the furniture a rich look.
Shellac wax is applied. Wax will protect the wood and add shine.
Is there anything else I should know about woodworking?
It is easy to underestimate the amount work involved with furniture construction. Finding the right kind of wood is the most difficult part. It can be hard to choose from the many types of wood that are available.
Another issue is that wood does not have the same properties. Some woods will warp over time, others will split or crack. These things should be considered before you buy wood.
What's the difference between plywood vs particle board?
Plywood is made of layers of wood that are pressed together under pressure. Plywood can come in many thicknesses and is used for flooring and cabinets. Particle board is made up of sawdust mixed in resin, then compressed into large pieces. It is used primarily for home improvements. Both boards can be cut easily and are both durable.
Statistics
- The U.S. Bureau of Labor Statistics (BLS) estimates that the number of jobs for woodworkers will decline by 4% between 2019 and 2029. (indeed.com)
- Average lumber prices rose about 600 percent between April 2020 and May 2021. (familyhandyman.com)
- The best-paid 10 percent make $76,000, while the lowest-paid 10 percent make $34,000. (zippia.com)
- If your lumber isn't as dry as you would like when you purchase it (over 22% in Glen Huey's opinion…probably over 10-15% in my opinion), then it's a good idea to let it acclimate to your workshop for a couple of weeks. (woodandshop.com)
External Links
How To
Tips for driving a nail in wood
To drive a nail into wood, the first step is to select the right size and type hammer. The most commonly used types of Hammers are claw hammers. Each type of hammer has its pros and cons. For example, a claw hammer works best when you want to hit something hard, like nails; however, it's difficult to control precisely where the blow lands. Although a sledgehammer can be used to hit large areas quickly, it is too heavy to be useful for small tasks.
After choosing the right hammer, place your hand flat against the side of the head so that the handle rests comfortably in your palm. You can grip the handle with your fingers, but not so tight that it causes injury. Your wrist should be relaxed while you hold the hammer straight upwards. You should then swing the hammer straight up, keeping your wrist relaxed. You should feel the impact on the nail from the hammer. If you're having trouble getting the hang of swinging a hammer, practice with a block of wood until you get the rhythm down.
Once you are ready to drive the nail, place the hammer close to your body. To ensure that the nail is perpendicular on the surface of the wooden floor, position it. Keep your focus on the tip of each nail. Swing the hammer forward, and then move the hammerhead. You can repeat this several times, increasing your swing speed. Once you've mastered the technique, try adding power to your swings. Then, raise the hammer from your shoulder to bring it down. This will allow you to exert more energy.
Once you have made the first hole, remove your hammer. To pull out the remaining nails, use a screwdriver or pry bar. To prevent splitting the wood, ensure you keep the nail heads flush against the board's surface.